
From the previous post in this series you should have a default NEXT.js project set up with a single page located at pages/index.tsx. Now you are going to build a consistent layout your site by creating shared components that all the pages you create will inherit. The goal is to ensure that your users have a unified experience across any page that they visit in your application and as a developer you will be able to avoid making redundant changes across your site as it evolves. To do this we will be performing the following tasks:
- Create components for portions of the site that will be used on pages, ex. header, navigation, and footer.
- Create a custom document page to override the default NEXT.js page rendering method.
Creating Components
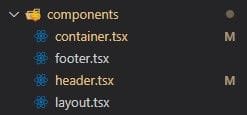
In VSCode create a new folder called components. Create the following files in the new folder:
- container.tsx
- footer.tsx
- header.tsx
- layout.tsx
Once the files have been created add the content shown below to each file and save.
container.tsx will be used by other components in our project, it serves as a wrapper for any nested React elements:
type Props = {
    children?: React.ReactNode
  };
const Container = ({ children }: Props) => {
return <div>{children}</div>
};
footer.tsx will contain any code and/or elements you want to display at the bottom of your page. For now we will keep this simple with a reference to the SITE_NAME variable and a copyright tag just to demonstrate some basic HTML as well as some generic dynamic scripting:
import Container from './container';
import { SITE_NAME } from '../lib/constants';
const Footer = () => {
return (
<>
<footer>
<Container>
<div>{SITE_NAME} © { new Date().getFullYear() }</div>
</Container>
</footer>
</>
)
};
header.tsx contains the site header, which most commonly includes top level navigation and/or your site information. In this example you are adding a basic title and a single link to the home page which will be accessible from all pages.
import Link from 'next/link';
import { SITE_NAME } from '../lib/constants';
const Header = () => {
return (
<>
<div>
<nav>
<div>{SITE_NAME}</div>
<div>
<Link as={"/"} href="/">
<a title="Home page link">Home</a>
</Link>
</div>
</nav>
</div>
</>
)
};
layout.tsx combines the header and footer and adds a placeholder for any child elements in a dedicated content section:
import Footer from './footer'
import Header from './header'
type Props = {
children: React.ReactNode
}
const Layout = ({ children }: Props) => {
return (
<>
<Header />
<div id='content'>
<main>{children}</main>
</div>
<Footer />
</>
)
}
Custom Document and Home Page Update
You will now create an override for the default NEXT.js [document rendering method](https://nextjs.org/docs/advanced-features/custom-document "click here to see additional documentation on the NEXT.js Custom Document" ). This will allow you to customize tags, ex. setting the lang property. In order to create the override you just need to create a new file pages/_document.tsx and add the following:
import Document, { Html, Head, Main, NextScript } from 'next/document';
Finally open the file pages/index.tsx and update it to use the Layout component. Since the Layout component contains the common header/footer components they will automatically be inherited by the page. The Layout component also accepts multiple child elements; you can see how that is being leveraged below to inject information into the document head tag (a custom title) and again in the page content - in this specific iteration content is still just static text:
import { SITE_NAME } from \"../lib/constants\";
import Head  from 'next/head';
import Container from \"../components/container\";
import Layout from \"../components/layout\";
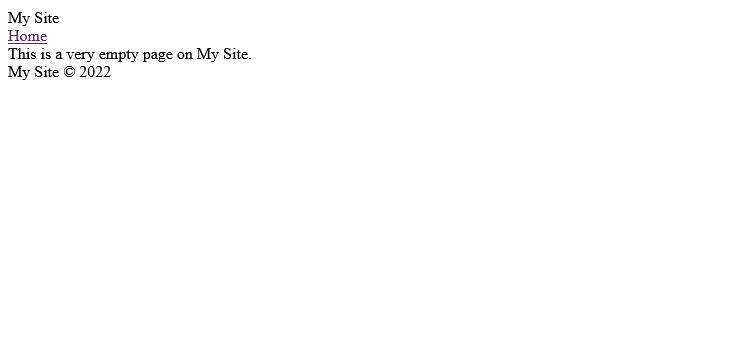
With all of the above changes completed, run your development project again with npm run dev from the command window in VSCode. Open http://localhost:3000 on your browser and you should see the following:
It may not look like it, but at this point in the process you have created the building blocks required to very quickly and easily customize your site to create a unique look,; most importantly you can do so with a clear sense of how your content is organized and how all of the components in NEXT.js work together.
Member discussion: